Stinky-poo yard
This week: Stinky-poo yard; Workbench construction; Master craftsman; New word; New species; Garden flowers;

We’ve had some much needed rain this week, not a huge amount, just 14 mm, but a slow and steady, all day rain event.
The sort of event that will water deeply to the roots rather than running off a parched soil. Now the problem is the weeds. I think I will need to spend some time next week in the orchards…
Stinky-poo yard
I tend to write up a draft text for the blog over a week, often in the evening, like now.
The late sun is shining through the northern window. I have all the windows open in the study, and I have to say it SMELLS!
The next stage of the work in the new building has been a bespoke, fitted workbench to go in front of the old stone stable wall in the new workshop.
I ordered the timber a while ago, but I needed to wait until the building was finished before I started to build the workbench.
To maximise the available space, it is a made-to-measure, built in type. This is not the sort of thing you can find anywhere to buy
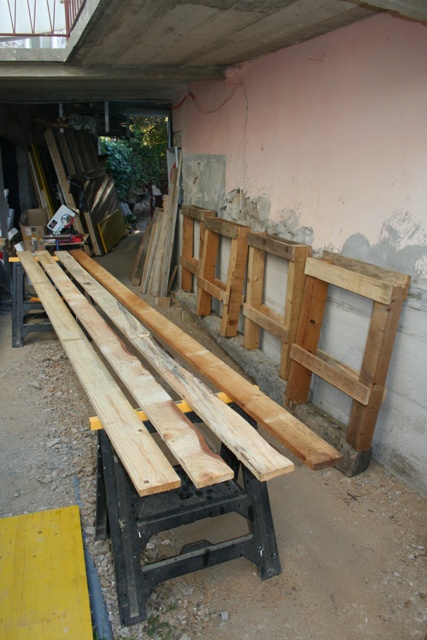
I started this week by constructing the legs. They are substantial and perhaps just a tad over-engineered, using timber baulks which are 12 x 10 cm by 93.5 cm tall.
To make sure that the finished worktop level is the same as all the other work benches, the precise 93.5 cm allows for two layers of wood to go on top. It is also my personal ideal worktop height based on my elbow and forearm height.
Workbenches tend to be used for all kinds of things which involve large and heavy hammers, heavy vices and power tools, each of which can seriously damage wood. So I am using a dual layer method of construction for the top.
A permanent and substantial under layer and a no less substantial but replaceable top layer of interlocking planks. These are quite cheap to buy and will take a lot of damage before they need replacing.
You cannot obtain treated timber here, so you do-it-yourself using chemicals supplied by the builders merchants.
As the weather has been nice this week I decided to do all the work outside in the courtyard. I treated all the first parts of the bench with KEMOCID, the propitiatory treatment here for timber to prevent insect attack.
Being inside, I’m not worried about rot but wood boring insects are a real problem in untreated timber.
This is made by a chemical company in Lužani, Slavonia. I easily found the product on the company web page, but there was no product data sheet. However it says to apply the solution undiluted.
As soon as I opened the 5 litre plastic container, the chemical smell was noticeable. It was strong, like a solvent or superglue.
I painted the timber and left it to dry, which it did quickly in the warm sunshine.
Even working fast, in the open air, with a breeze blowing, there were occasions when I had move away because of the fumes. Altogether, it is not a nice substance to work with and there is no wonder it is so effective against the wood boring insects.
Even though there was a light wind, the smell in the courtyard was overpowering.
I looked at the container, but there was no indication of any requirement for PPE. But I was very pleased to get out of the fumes.
It was only to later I found that because one of the windows in the study overlooks the courtyard, there were fumes inside as well.
Workbench construction
With the legs pre-assembled and moved into place, the next job was the actual workbench.
I am doing the construction “on site”, because it is a heavy weight piece of equipment – much too heavy to lift in one piece. Also being made-to-measure, it is a tight fit, especially in the corners.
With levels, I fixed all the various elements so they are both vertical and horizontal, and as a bonus, are at 90º to the legs. I am using TORX screws of various lengths and diameters throughout.
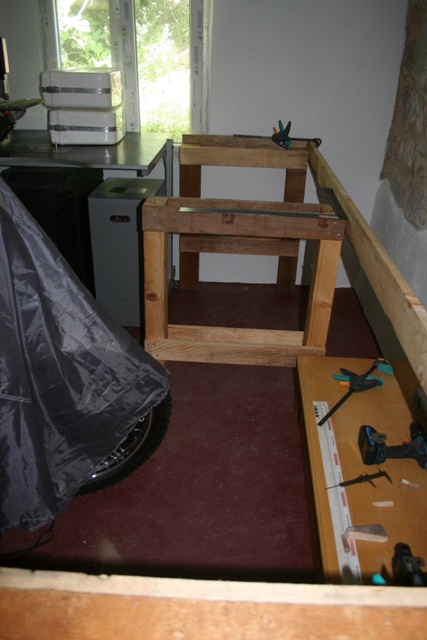
They are neater than nails and also with an electric screwdriver, they are easy to fix one- handed. I did use some screw clamps as well, to hold the long rails in place while I fixed them.
With the rear rails securely in place, I gently slid the now fixed legs up against the wall. It may be a while before I see that bit of the wall again!
I want the bench to go across the complete width of the wall, which because it is 450cm long means that standard 4 metre lengths of wood have to have extensions.
That issue was part of the design, to make sure that there is somewhere strong to screw short extension pieces into.
With the frame finished, I added the first of the worktop bed boards.
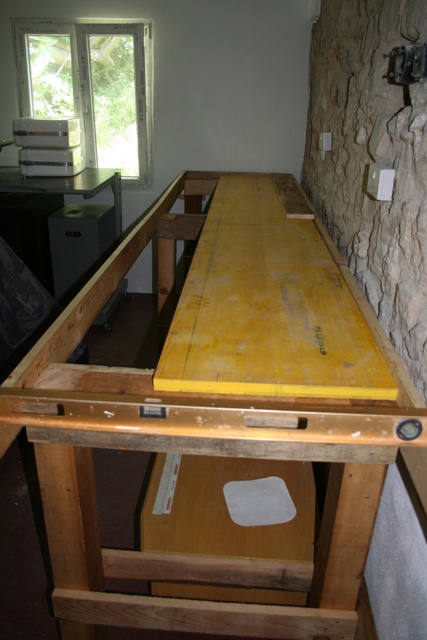
These are the foundation of the worktop. I have several yellow boards that I was using for another purpose, which were now redundant, so I used them as the base of the bench.
Onto this will be fitted the actual wooden working surface of the worktop. Because over time this will get damaged in one way or another, I am using cheaper 18 cm wide softwood boards for the actual work surface.
Although screwed into place, if one or more ever needs to be changed, they will be easy to remove and to fit any replacement piece. It also means I do not have to worry about any damage, holes or anything.
There is all sorts of day to day wear and tear that bench work-tops suffer from.
If you look at carpentry websites, you can see some fantastic craftsmen made work benches. They are constructed out of hardwood, lovingly sanded and polished.
No doubt they compliment the beautiful pieces of furniture that their owner will create.
However when you are servicing a motorcycle engine, gearbox or doing similar work, such an almost ornamental piece would very soon show signs of damage.
I’ve gone for unfinished timber, with the exception of the front, top guard rail. This length of rail I have smoothed and polished, so when working close to the bench there is nothing to pull threads in clothing or otherwise snag you as you work.
It is a quick job to set up the planer/thicknesser machine and then feed the length of timber through. It comes out glass-smooth and square, just ready for a coat of polish.
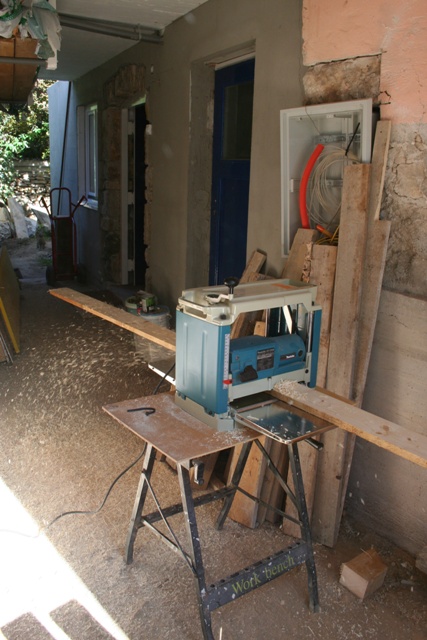
When the planer/thicknesser is finished, I always collect all the shavings, to be burnt in the wood stove next winter.
I cut and fitted the shelving boards, which go along the bottom of the bench. They are set at the height of IKEA Samla storage boxes. This is so I can use the floor underneath for storage. I then moved in my electrical tools, so there is a place for everything and everything is in place.
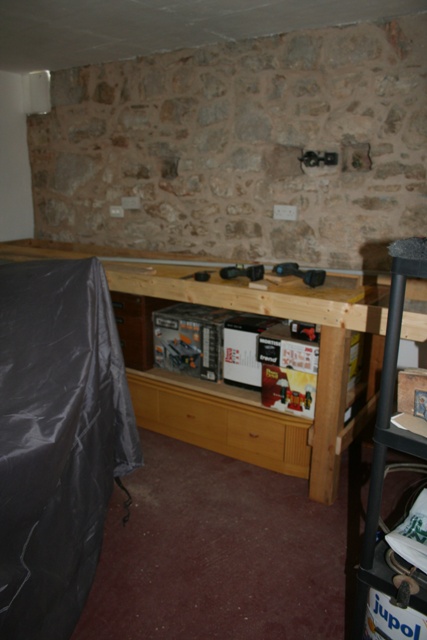
I have to say that after the past few years of having tools and equipment spread across several stores, just having everything together in one place is fantastic and significantly eases the workflow of any job.
Master craftsman
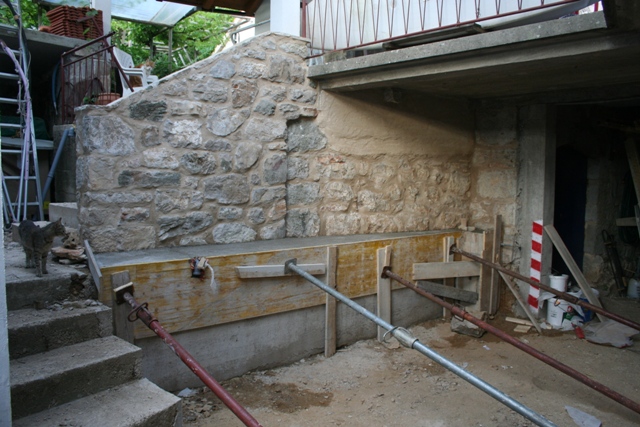
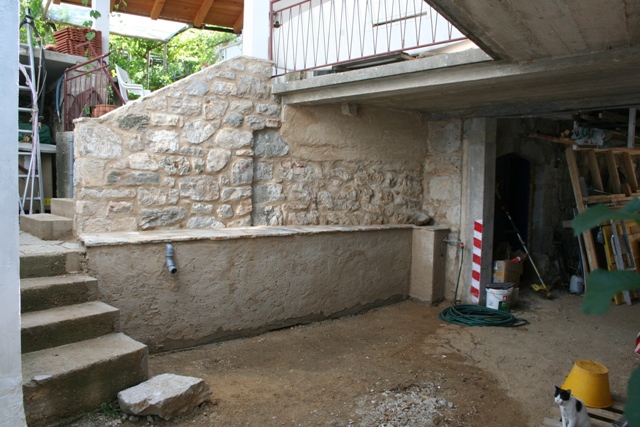
The building work in the courtyard is almost finished.
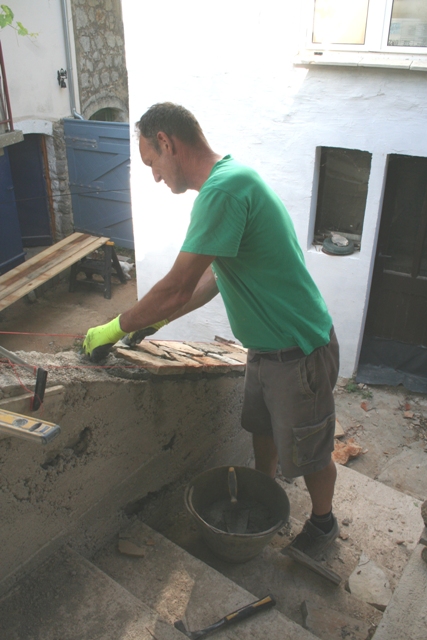
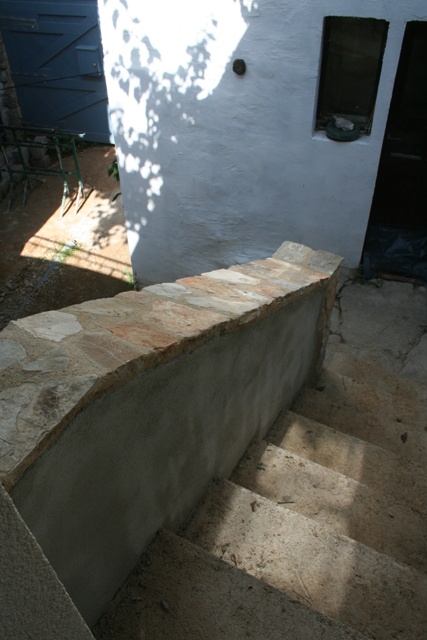
I need to get stone sets down on the sandstone floor, but what a fantastic job Cvjetko has made of the work. He richly deserves the title “Master Mason”.
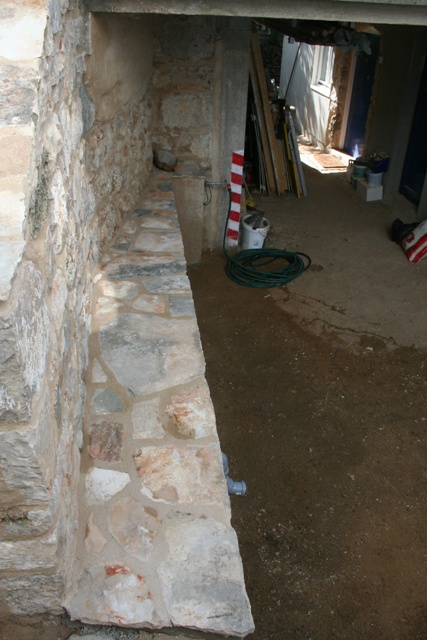
To watch him take a piece of old roofing stones that I salvaged from the stable/pigsty/goat shed roofs, and with a few deft taps with a hammer knock it into shape.
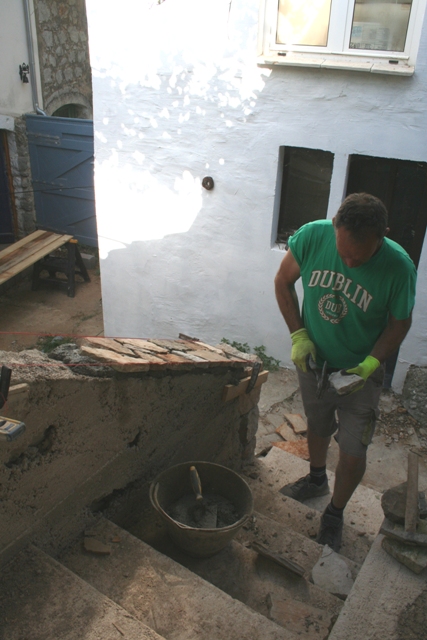
Just a corner here, or to straighten an edge there and then he places it and others into a jigsaw of crazy paving.
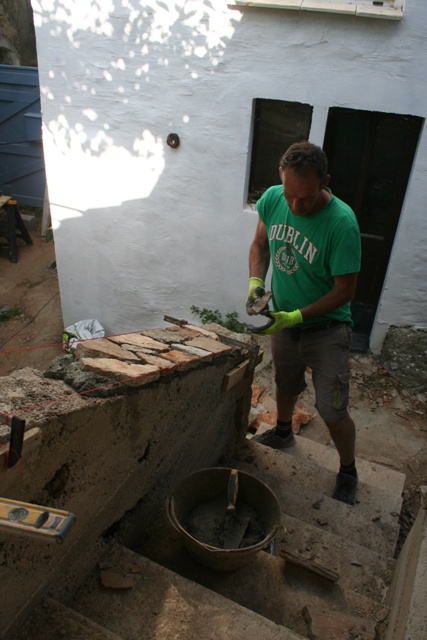
But what a result.
I think I have about another 12 months of building work before everything is finished.
That is because there are few true craftsmen here and those that are, are in high demand.
I have only really got all this work done because of COVID-19. With the island being in lockdown, islanders didn’t want workmen around. Now they do!
Because I need a building licence for the final stage, it will take longer to get the final work done. Not so the sets in the yard, which need no permission, just time…
New word
I learned a new word this week, “Klotski“. It is one of those foreign words that has slipped unnoticed into the lexicon of English from the Polish language.
The word in Polish means wood. However it now describes a sliding block puzzle made up of ten different size pieces.
It visually sums up what I am doing at the moment. As I rationalise my storage, open some boxes, move all the tools and workshop equipment into one place and generally try and get more organised and less cluttered, I am gaining space.
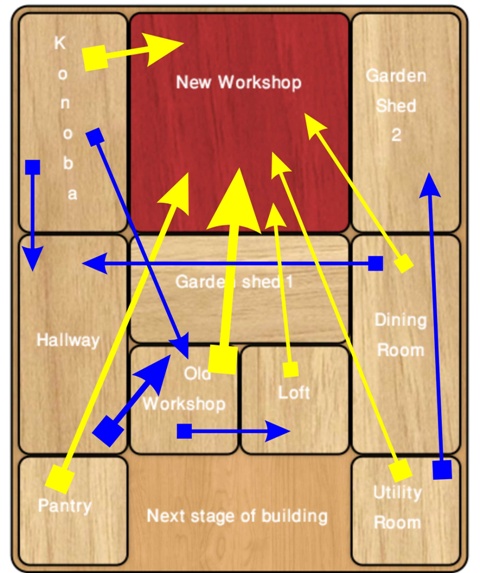
This requires a degree of planning, some choreography, muscle power and mechanical assistance.
Notice that there is a bit of blank canvas at the bottom. There are two more squares to be fitted into the puzzle and once they are in place, the puzzle will be complete.
So please remember “Klotski” for the next time you are playing Scrabble.
New species
Even after five years, I keep finding and/or seeing new species in the garden. This week it was a wasp.
I admire the growing height every day of my Triffid, in the border of the Top Orchard.

Now exceeding three meters and still growing, it is already ⅓ the height of the mature plum trees that are in the orchard.
As I was looking one evening his week, as the last rays of the setting sun were on the blue flowers, I saw several VERY large insects feeding.

We have a number of bee species, some of which are quite large, but this fella dwarfed them.

It didn’t take much of a search in my books to identify it as a Mammoth Wasp, Scolia Flavifrons. At any time there have been between six and ten on the plant, feeding on the nectar.
This is the largest wasp found in Europe. These are males, identifiable because the females have yellow heads.
They are some 3.5 cm long and very noticeable which is why I am surprised not to have seen them before. The insect is about four times the size of a honey bee, which will give most people an idea of their size.
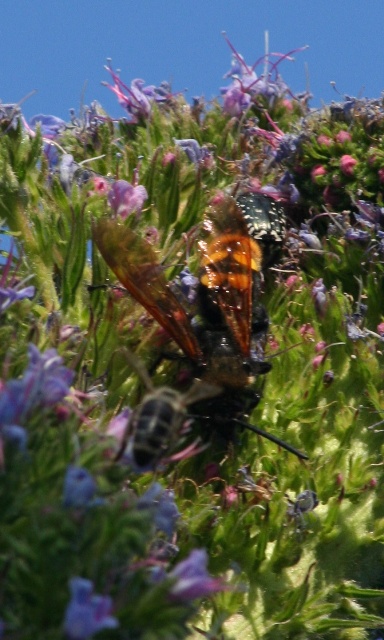
Reading up about them, they are parasitic, laying their eggs on the larvae of the Rhinoceros Horn Beetle.

I have not seen any of these distinctive maroon beetles either, but there must be some close by.
Perhaps they are in the Maquis behind my home. Throughout there is a lot of decaying wood, and because that is the direction the Mammoth Wasps fly off in.
Garden flowers
This week my Fox Tail Lilly’s, Eremurus have started to flower.
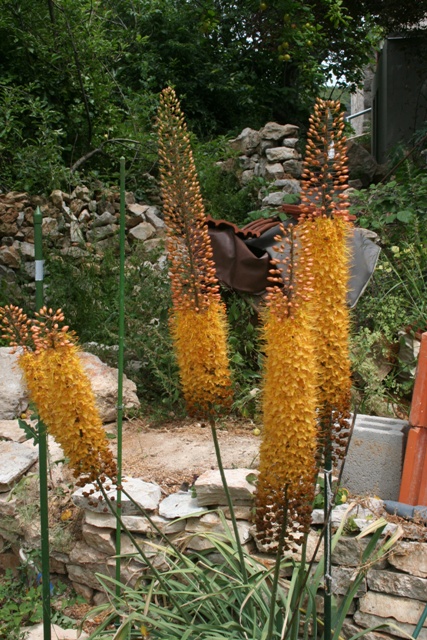
They seem to like the sunny spot where I planted them. Although the bed is in partial shade and quite dry, when the sun catches these flowers they light up like tongues of flame.
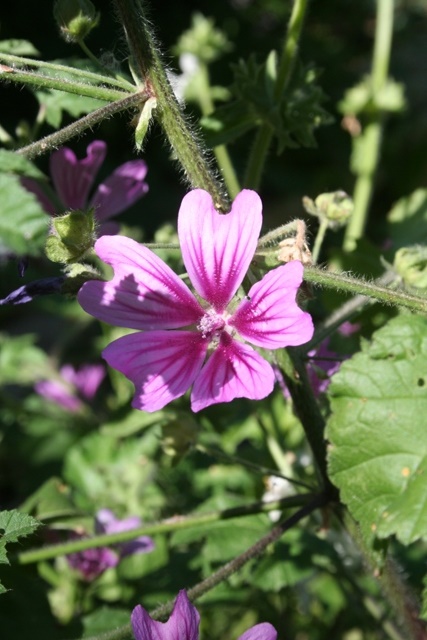
Another pretty weed which is in flower in the orchards and along side every path through the Maquis is the Common Mallow, Malva sylvestris.
I also found this Burnet moth feeding in the top orchard.
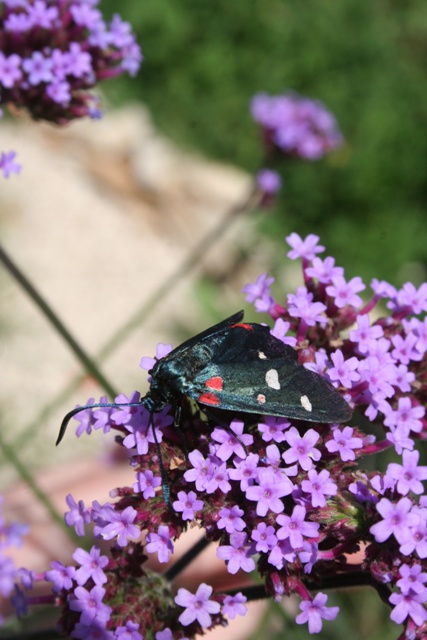
It is easily identified because of the green metallic sheen on the wings. But because of the mixed red and white wing spots, I’m not sure exactly which species of Burnet moth it is.
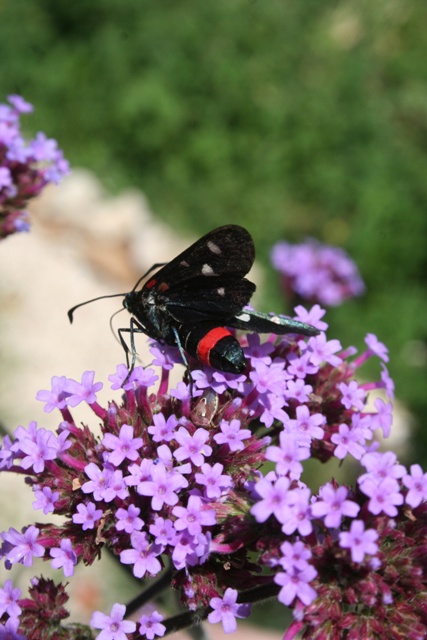
There are many sub-species of Zygaena, including the well know Six Spot, but I’m just not sure about this one.
Another regular visitor this week has been the Comma butterfly, Polygonia c-album.

These brightly coloured butterflies can be identified by the white “comma” half moon marking, visible on the rear underwing.

I seem to have a healthy ecosystem, judging by the number and variety of insects that are around the flowers and orchards. They are here all day, every day. NRC.
One Response
Brian Homans
Another interesting week. Well done with the bench!