Orchard capers
This week: Underestimating difficulty; Next steps; Pruning time; Propagating plants; Orchard capers;

It’s been mild and sunny during the day this week and with cloudy skies at night time, we have had little frost. That’s both good and bad. Bad because if all the growing things start to think that it really is spring, and then we do get a cold snap, it will set everything back.
Good because I have been able to get on with a number of jobs.
Underestimating difficulty
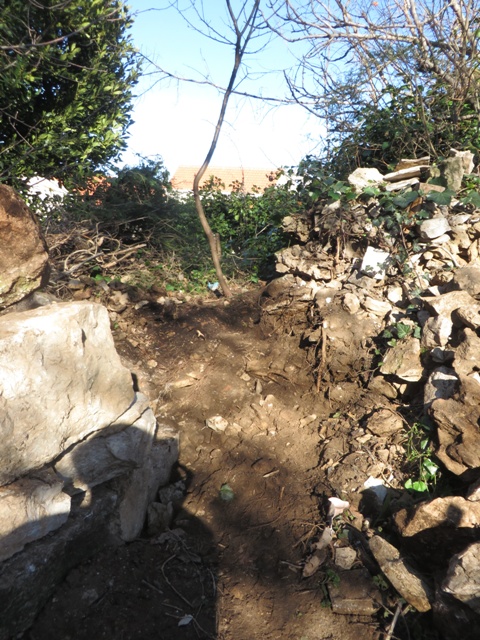
I started the week with the intention of really making progress in clearing a path towards my boundary at the back of the fold yard. I think I’ve bitten off more than I can chew though.
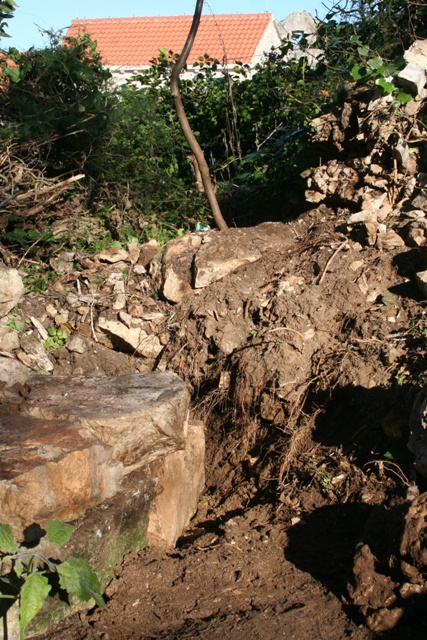
The walling has gone reasonable well. I have added several layers to the dry stone wall and have shifted several of the large stones, being innovative in how, with just one pair of hands, I lift them into position.
My dry stone walling technique is a three stage process. First I look at the place where I want to place the next stone. Then I wander round the salvage area looking for stones about the right shape and size. Finally I measure the void and the stones to see which will be the best fit and finally move it into position.
The master wall builders of old would eschew using a measure. Everything was by eye, and a superb job they made of constructing walls which have withstood centuries of use.
In most cases these craftsmen would have space and some assistance. I have neither. Although as I have demolished buildings and removed the stones, I have cleaned and graded them into approximate sizes.
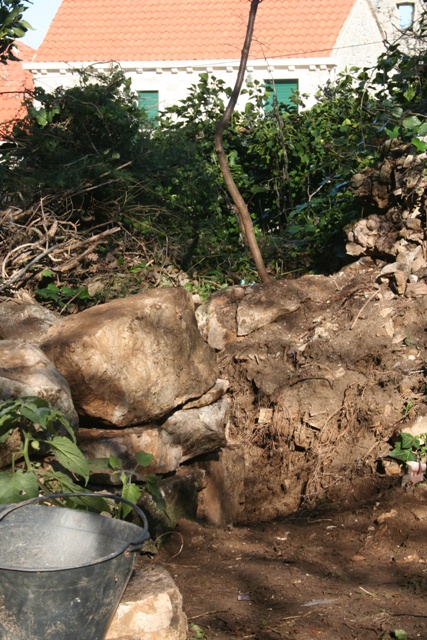
The boulders which the baby JCB brought out of the foundations were just piled anywhere – but closeish to where they would be needed.
But after two days work, the difficulty ahead is clear. The stones and (small amount of) rubbish buried with them is horse work to remove. There is also some quite good soil towards the base of the old wall, which I want to keep.
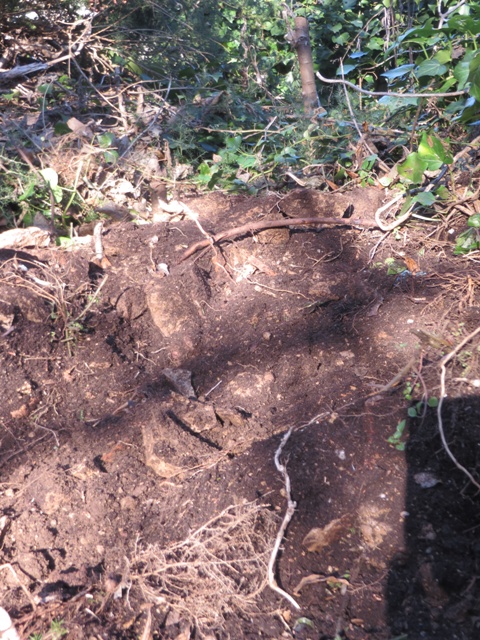
The area being under a canopy of trees means that for every year of the walls existence, leaf matter has fallen and then been dragged by insects into the wall crevices. This leaf mould has become a very rich, dark brown soil.
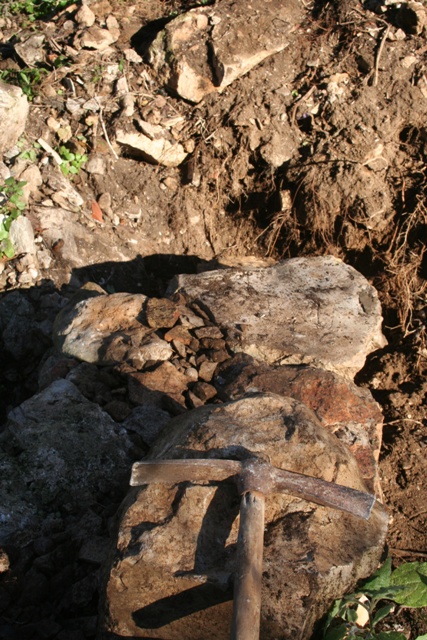
My workflow is something like this: Remove large stones in old wall by hand and reserve. Remove smaller stones in old wall and pile up. First with pickax then with hand mattock break the tightly packed fill of the wall. Remove everything fist size or larger by hand. Rake the remaining material into a bucket. Hand sort the big bits of stone, tile and debris. Use garden sieve to separate soil from the rest.
I then use the stones, large and small, to fill the voids in the new wall I am building and tamp them firmly into place. My walls are not going to collapse anytime soon!
But after a couple of days, I just have to look at the sheer volume I need to remove. I think it is beyond being done by hand.
Next steps
I estimate that from where I am working, just to get to my boundary, there are two cubic meters to clear. And the deeper I go, the worse the jungle becomes, but there is a lot of usable space in there…..somewhere.

Rather than thinking of cubic meters, I was visualising how many truck loads of rubble will need to be moved – and how! I think around six to clear it properly.
With around four cubic meters to a truck load, that is an awful lot of manual work but the problem is getting the mini digger back.
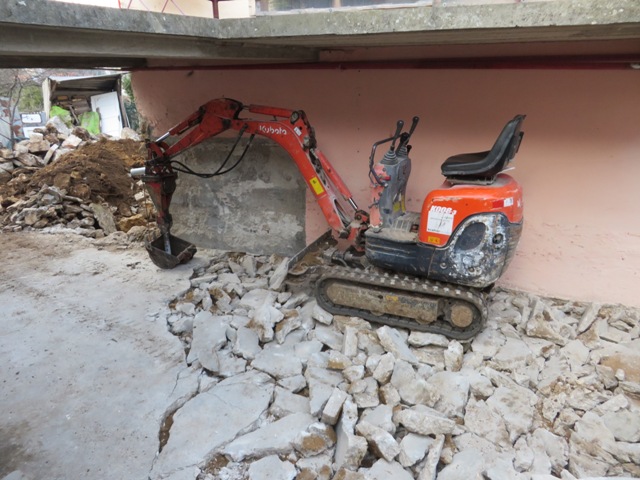
There are few of them on the island and this is the peak building period, between now and the end of May.
Most locals have two or more occupations. Builders in the winter become restaurateurs in the summer and then farmers in the autumn.
The annual prohibition on noisy building work from mid-June to mid-September, means they have to have other means of making a living. Then they are all landowners too, so there are grapes and olives to be harvested and turned into wine and oil.
So when January roles around, there is a frantic dash to do all the building work before the summer, and hence plant and machinery is in short supply.
If I were to look at any business here, I would be thinking of plant and tool hire. There is nowhere that you can go to hire anything, whether it is for a small DiY project, or a large building construction.
In the mean time I’m looking at how I can get a mini digger to help with the work!
I didn’t meet my target for the week – I’ve not started bedding in the landing stones at the top of the steps, but I’m happy with how far I’ve been able to get.
Pruning time
I have a really useful garden book with the title What Plant Where ISBN 978-0789401519 . By the celebrated author Roy Lancaster CBE, it delves in great detail into every conceivable type of garden location and the plants that will thrive in those conditions. I met him at an event in London some years ago.
What I received in an email this week was a smaller publication, but what I would describe as What Plant When. The BBC Gardener’s World Year-round pruning guide, does just what it says on the box.
It is just a guide rather than an encyclopedic work, but it reminded me that I need to get on and prune, never mind dry stone walling!
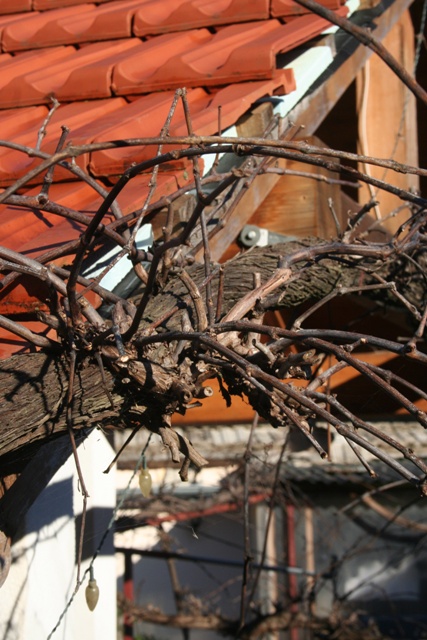
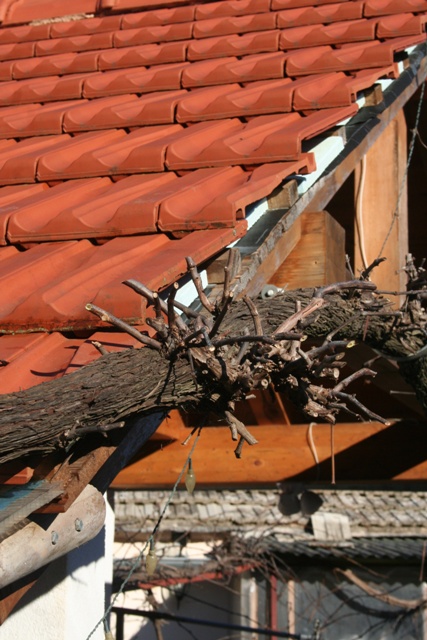
So I’ve made a start on the grape vines this week. Vines should be pruned in early to mid winter because any later and the sap will already be rising and cuts will bleed. With only a small number of vines, it was not a long job.
Do I know what I’m doing? Well, sort of.
OK then, no not really! But I have a couple of books. However it does nothing for your “street cred” if you are seen at the top of a pair of steps, secateurs in one hand and a book in the other….
I am following what the books say and cutting back the vine spurs to two buds. When you see the vintners in their fields at this time of year, they are rapidly moving along the rows of vines snipping faster than the eye can see.
True, they have electric secateurs (bought using EU farming grants) rather than the hand powered ones I have, but also the vintners have decades of experience. I’m only on my fifth vine prune…
It’s obvious were a spur needs cutting back further. In this photo the green shoot on the left is alive and well, the brown one is dead.
They do die, but it’s not a sign of disease in the vine. However I take my time, considering the best place to make the cut.
It seems to work, I have a lot of grapes each year. But mainly this vine is for shading the courtyard from the summer sun. Grapes are just a fun bonus.
The apples and pears can wait a bit, but the apricots and peaches needed doing very soon as well.
Propagating plants
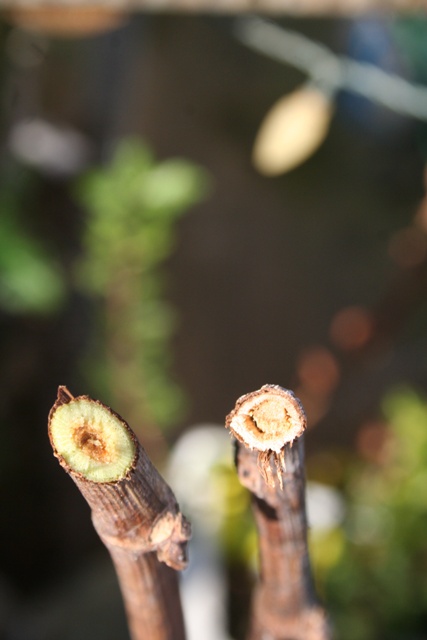
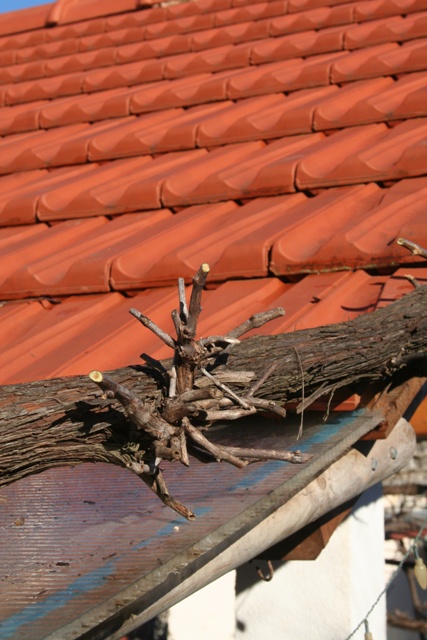
Having dug out the old wall and removed all the large stones, on Friday I removed and potted up the second of the Myrobalan plums. The sapling was actually considerably larger than I had first thought, being almost three meters high.
I thought it was going to be easy as I gently removed soil from around the roots which radiated from the bottom of the trunk. Then I discovered it had an enormous link to an underlying feed root from the main tree.
The diameter of this root was close to 5 cm, so I started to try and get as much of it out as I could. But the moment I tried to lift the tree by the trunk, the feeder root just snapped. These sub surface roots from the main tree are very brittle and snap easily.
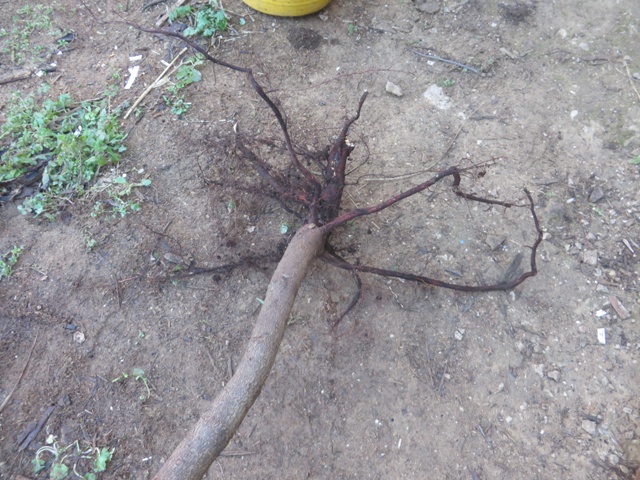
So I did the only think I could do. I had already prepared the largest plant pot I had, with a good base of stones and sand to make it free draining. I then added garden soil. The broken ends of the roots were dusted with a hormone rooting compound and then put into moist soil in the pot, carefully covering all the exposed roots and firming the soil with my fingers.
Finally I topped up the pot with a mix of soil and potting compost, watering it in. Looking at the root structure, the sapling seems to have developed it’s own system of feeder roots.
I am hopeful that with TLC and moisture, I can encourage it to grow. It will be a lot easier to control the growing environment for the first year when it is in a pot rather than open ground. But only time will tell if I have been successful.
While I was on with the propagating, I potted up some cuttings from a Brown Turkey Fig. The tree is growing wild alongside the lane near my Dol House and every year has the most delicious early figs.
I took the cuttings earlier in the week and have had them in water. I planted some in pots and some layered in soil. I’ve not had much success with propagating cuttings from this particular tree, so I’ll put the pots into the heated propagator. The layered shoots will stay outside.
Orchard capers
Last year I found several Capparis spinosa growing in the old walls up by St. Michael’s Church on the promontory above the two villages.
They have the most beautiful flowers in summer.
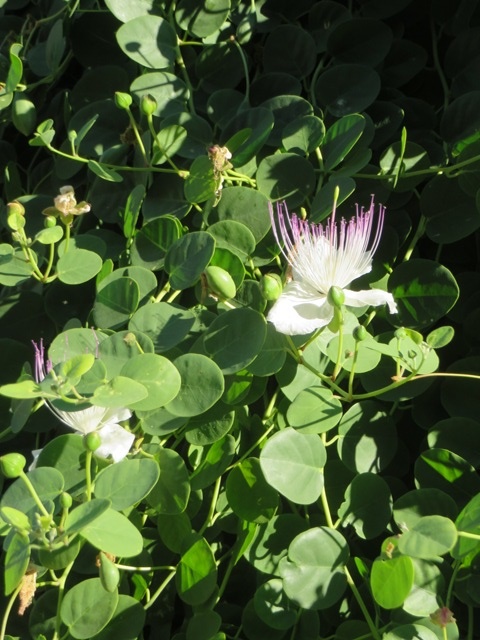
The geographic origin of the Caper plant is disputed by plant historians. However what is not in dispute is that they have been grown around the Mediterranean basin for at least 3,000 years.
Capers are mentioned in the Bible and the Kabr Hadith of the Quran. They were used and spread by both Greek and Roman civilisations.
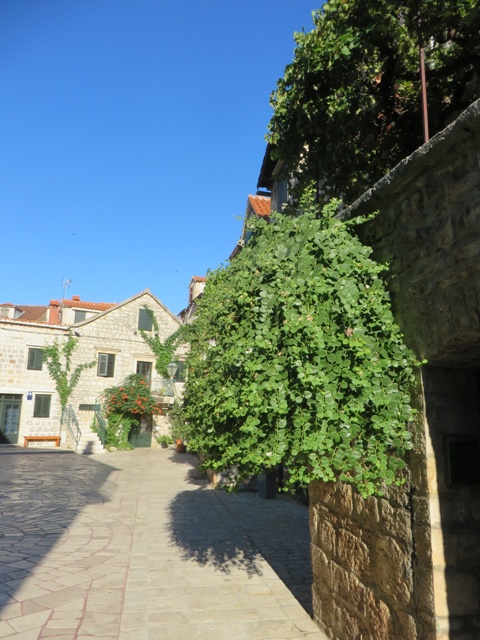
As birds spread the seeds which readily germinate, plants can be found high up on monuments and building. In fact anywhere the seed can extend roots and grow. Around Dol they are found in the old walls and can be seen in Stari Grad walls too.
With a lot of stone walls around my Dol house, not least my latest creation, I had decided that I would try and propagate some plants to put in my walls.
I collected some basal cuttings from a couple of the bushes sprouting from wall crevices.

These are tough plants. I didn’t take a knife with me, so had to pull the shoots off the main plant. This is not perhaps the best way to take cuttings. However it worked. The Purdue University has a detailed fact sheet page all about Capers.
After tiding up the base of each stem, I dipped them in rooting powder. I then planted each cutting into a pot filled with with a coarse mix of potting soil and sand. They have gone into the heated propagator.
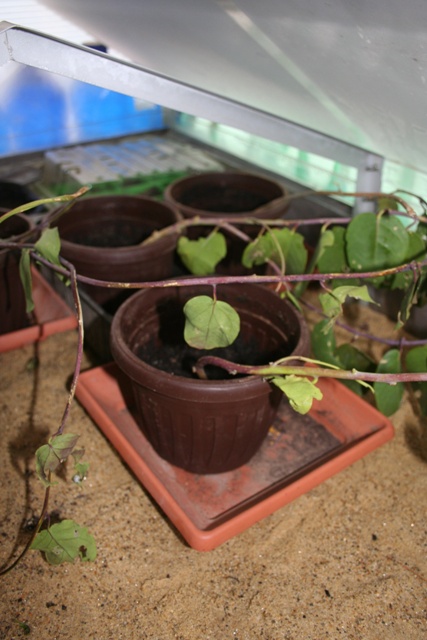
Capers are difficult to propagate apparently, so I’ll see if I have any success. But one thing is for sure. If I don’t try, I never will… NRC
2 Responses
Andy Obridge
Certainly a niche for a tool hire shop Norman. I have had to buy quite a few tools I will use once in a blue moon, if that often! You can only borrow so much from neighbours and any building equipment, scaffolding etc, no chance. In fact I lend more out than borrow.
I am sure, but you will know better, the stop/start of Spring last year confused and ruined vegetables etc. I don’t have much success anyway but was a total fail!
Tony Griggs
Looks like a job for a mini digger Norman. You may have to wait! We’ve been having strange weather here. Smoke from fires then late autumn weather….rainy overnight, not our usual summer nights Thats for sure! Guess you are looking forward to Spring! We are looking forward to a “normal” autumn! Not sure we will get it though!